Installing ODIN
Last updated 2008/03/18
Return to the Suffield Academy Network Documentation Homepage
A printable version of this document is also available.
Introduction
Odin is a program used by Suffield Academy for Point-of-Sale and student debit accounts. We currently use it in the Snack Bar, Bookstore, and the Business Office (to maintain student accounts).
This document describes how to install the Odin client for Windows (Odin does not run on any other platforms). Please note, our support contract with Odin entitles us to live technical support during normal business hours. Odin has a "live chat" system that allows an Odin support tech to share your screen and help with setup. If you have difficulty getting Odin to work, visit www.odin-inc.com on the client machine and follow the support links. Someone from Odin will look at the machine remotely and help you resolve the issue.
Prerequisites
This document assumes you have followed our Windows XP Installation instructions, and have a client machine that is on the Suffield network. Briefly, this means you must be running Windows XP Service Pack 2 with Domain Authentication enabled.
You must have access to the local Administrator account of the machine. Once the software is installed, regular accounts will suffice for running the software.
You must also have a networked account that belongs to the ODIN group, as well as a valid Odin username and password. Contact the Network Administrator if you do not have access to the Odin group. Contact the Business Manager if you need an Odin username and password.
Installation
Log in to the machine with the local Administrator account, then follow the instructions below to install and configure Odin.
Logging In to the Server
Get Login Scripts
We must install Odin as the local Administrator, but the data files for Odin are only accessible by certain networked accounts. Therefore, we must download a special login script that connects us to the server with a networked username, while letting us use the local Administrator account on the client machine.
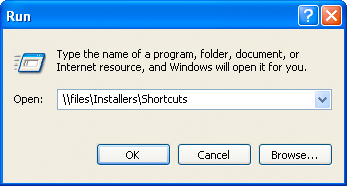
Go to the Start menu and click Run.... Type
\\files\Installers\Shortcuts in the box and click OK.
A window called Shortcuts will open. Find the file called
Mount Odin Network Drive.bat and copy it onto the desktop.
![]()
Close the Shortcuts window.
Disconnect Existing Sessions
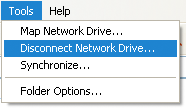
Before we can connect to the fileserver with a username, we must first disconnect any existing sessions. Go to the Start menu and click on My Computer. In the window that appears, go to the Tools menu and select Disconnect Network Drive....
If you get a message that says You have no network drives to disconnect, skip to the next session.
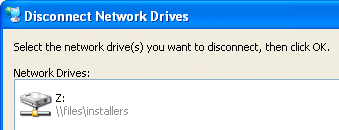
Otherwise, in the list of network drives that appears, select any that
start with \\files\ and click OK to disconnect from them.
Leave the My Computer window open when you're done.
Mounting the Odin Drive
Double-click the Mount Odin Network Drive.bat file on the desktop
and follow the prompts to log in. You will need the username and
password of a networked user who belongs to the Odin group. Contact
the Network Administrator if you need access to this group.
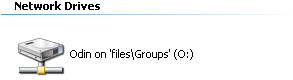
When you're done, the O drive should appear in the
My Computer window, with the label Odin on 'files\Groups':
You now have access to the Odin files, and are ready to begin installation.
Installing Odin
Running the Installer
Open the O drive. Inside the drive are several folders. Find and open the Install folder. Locate the installer program called SETUP.EXE and run it.
Install the software using the default prompts provided by the installer.
When you're done, the Odin folder from your start menu will appear and will contain shortcuts to the locally installed versions of Store Manager and Store Register. Delete these shortcuts, as we use the networked versions instead.
Additionally, open the folder C:\Program Files\Odin and delete
the Store and StoreMgr programs.
Configuring Odin Database
Next, we must configure Odin's database software.
Open the Control Panel folder:

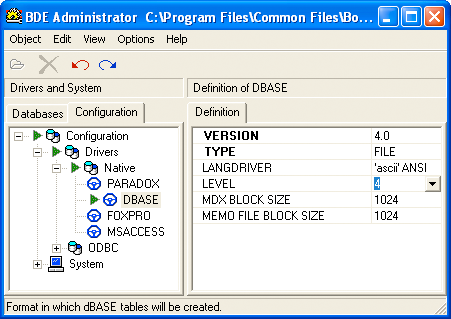
Open the BDE Administrator control panel.
Click on the Configuration tab.
Drill down through the configuration tree to get to
Configuration::Drivers::Native::DBASE. Change the LEVEL
parameter to 4.
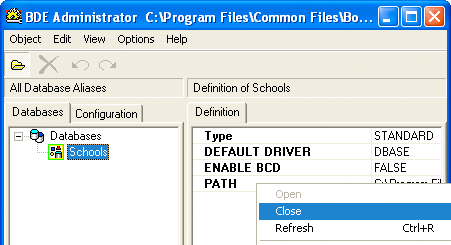
Next, click on the Databases tab.
Drill down through the configuration tree to get to Databases::Schools.
Right-click on the PATH key and choose Close.
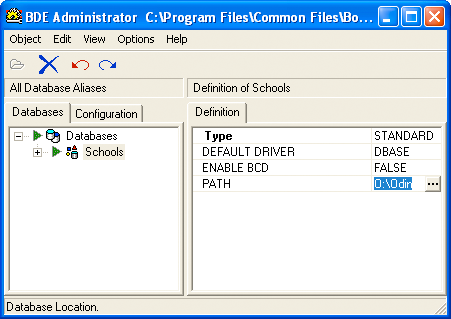
Now change the value for PATH to be O:\Data.
Close the BDE Administrator Control Panel, and save your changes when prompted. You should then receive a warning that all applications must be restarted:
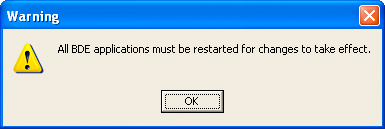
Dismiss the warning, and close the Control Panels window.
If you do not get this warning, stop. Go back and double-check your BDE Administrator settings to ensure that they took effect.
Copying the Configuration Files
The server contains a skeleton directory with a mostly-working
configuration. Open the folder O:\Local and copy the contents of
the folder into C:\Odin. Overwrite any existing files.
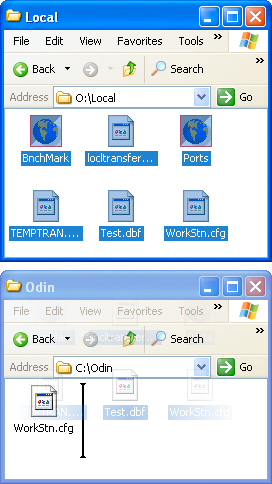
Open the file WorkStn.cfg using Notepad (or another text editor).
Each workstation that uses Odin must have a unique Register Code assigned to it. A list of codes that have already been used can be found in O:\Odin\Shared\RegisterAssignments.txt.
Under the [Register] section of the WorkStn.cfg file, change
the line Code to have a unique value (single letter or digit).
Add the value to the RegisterAssignments.txt file when you're
done. If you do not have access to this file, notify the Network
Administrator of the new register code.
Optionally, you may change the Odin area that the user sees by
default. Under the [Misc] section of the config file, you can
change DefaultSalesArea to have one of the values found in the
O:\Shared\odin.cfg file.
Close the WorkStn.cfg file and save your changes.
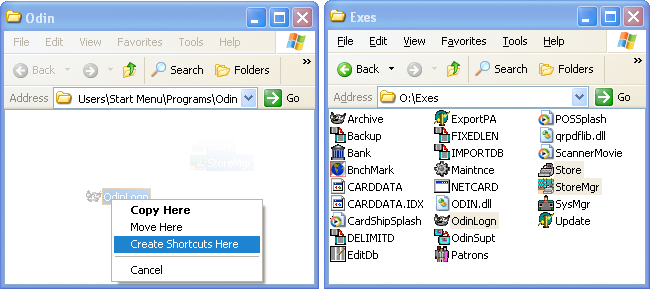
Link Executables
We must now make the programs available to the users on this computer. We must link executables from the O:\Exes folder to the local machine.
First, locate the executables in O:\Exes that you would like. Typically, most machines use OdinLogn, StoreMgr, and Store.
For each of these files, make shortcuts in the following two folders:
C:\Documents and Settings\All Users\Start Menu\Programs\Odin
C:\Documents and Settings\All Users\Desktop
Quick Test
At this point, Odin is correctly installed on the machine, and should be useable by the local Administrator. Try running OdinLogn and logging in with a valid Odin username and password. If that succeeds, run StoreMgr and confirm that you have access to the inventory files.
If that works, then you're ready to move on to the final step. If you have problems, go back and confirm that the installation was done correctly, or contact Odin Support for assistance.
Set Directory Permissions
Before Odin will work for other users on this machine, the permissions of a few files must be altered.
Follow the the steps in the section below for each of the following files and folders:
C:\Program Files\OdinC:\Program Files\Common Files\Borland SharedC:\OdinC:\PDOXUSRS
Right-click the file and select Properties. In the window that appears, click the Security tab. Click the Add... button.
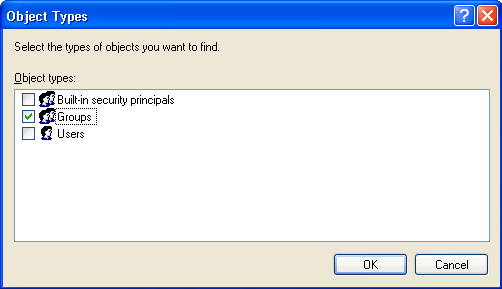
In the window that appears, click the Advanced... button.
In the window that appears, click the Object Types button. In the next window, deselect all choices except for Groups. Click OK.
Confirm that the Locations... reads SUFFIELDACADEMY (change it
to SUFFIELDACADEMY if it does not).
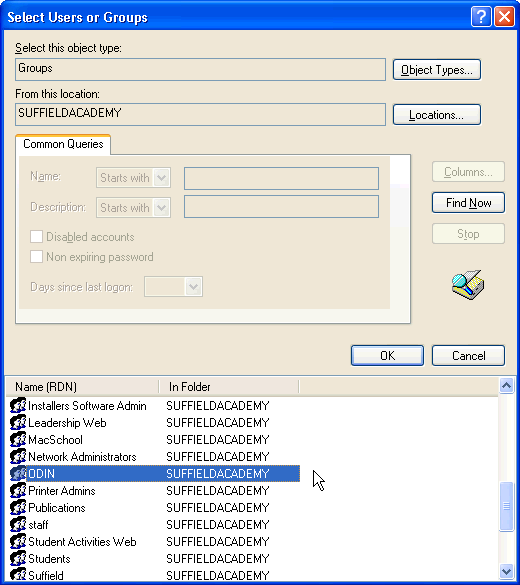
Click the Find Now button. The system may prompt you for a Domain Admin username and password. Enter it if requested:
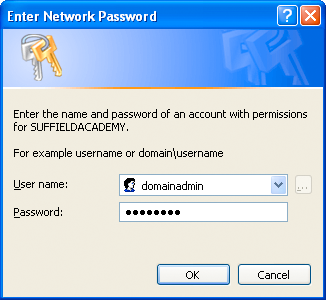
The system will produce a listing of all the groups in the
SUFFIELDACADEMY domain. Select the ODIN group and click
OK.
You should now return to the Select Users or Groups window, with the group listed in the selection box:
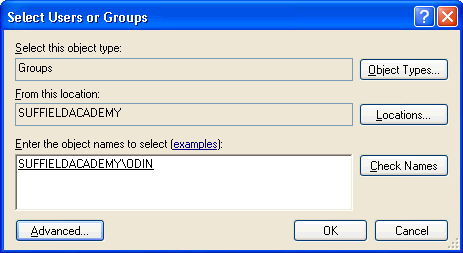
Click OK. You should be returned to the Properties window,
and a new selection should be added to the Group or user names box
called ODIN (SUFFIELDACADEMY\ODIN). Click on this group.
In the box at the bottom of the window, select the Allow checkbox for Full Control. Your window should now look like this:
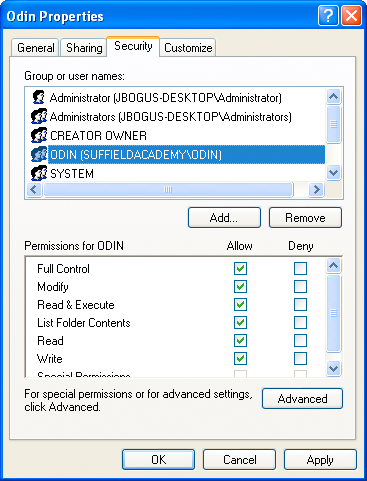
Click OK to save your changes and close the window.
Repeat these steps for all of the files and folders named above.
Wrapping Up
If you logged in to Odin earlier to test the setup, right-click the Odin icon in the system tray and choose Exit.
Finally, if a user of the computer needs to be added to the Odin group on the file server, please notify the Network Administrator. Ask them to add the user, and to change their login profile to automount the Odin drive on startup.